
USBLITER8 A12/A13 RP2350 Pwn DFU & Firmware Setup Guide
USBLITER8 – A12/A13 RP2350 Pwn DFU & Firmware Setup Guide
A complete guide to selecting supported RP2350 boards, flashing firmware, and using USBLITER8 Pwn DFU for Apple A12 and A13 devices.
⚠️ USBLITER8 is intended only for devices that you own or have explicit permission to service. Before powering any board, carefully verify all wiring and connections. Incorrect USB power or data wiring may permanently damage the RP2350 board, USB cable, or Apple device.
1. Hardware Requirements
USBLITER8 currently supports the following RP2350 development boards.
⭐ Waveshare RP2350 USB-A Recommended
This is the recommended board for all users.
- Advantages:
- Built-in USB‑A Host port
- No cable cutting required
- No soldering required
- Plug the Lightning cable directly into the board
- Most stable and easiest to use
This is the best choice for everyday use.
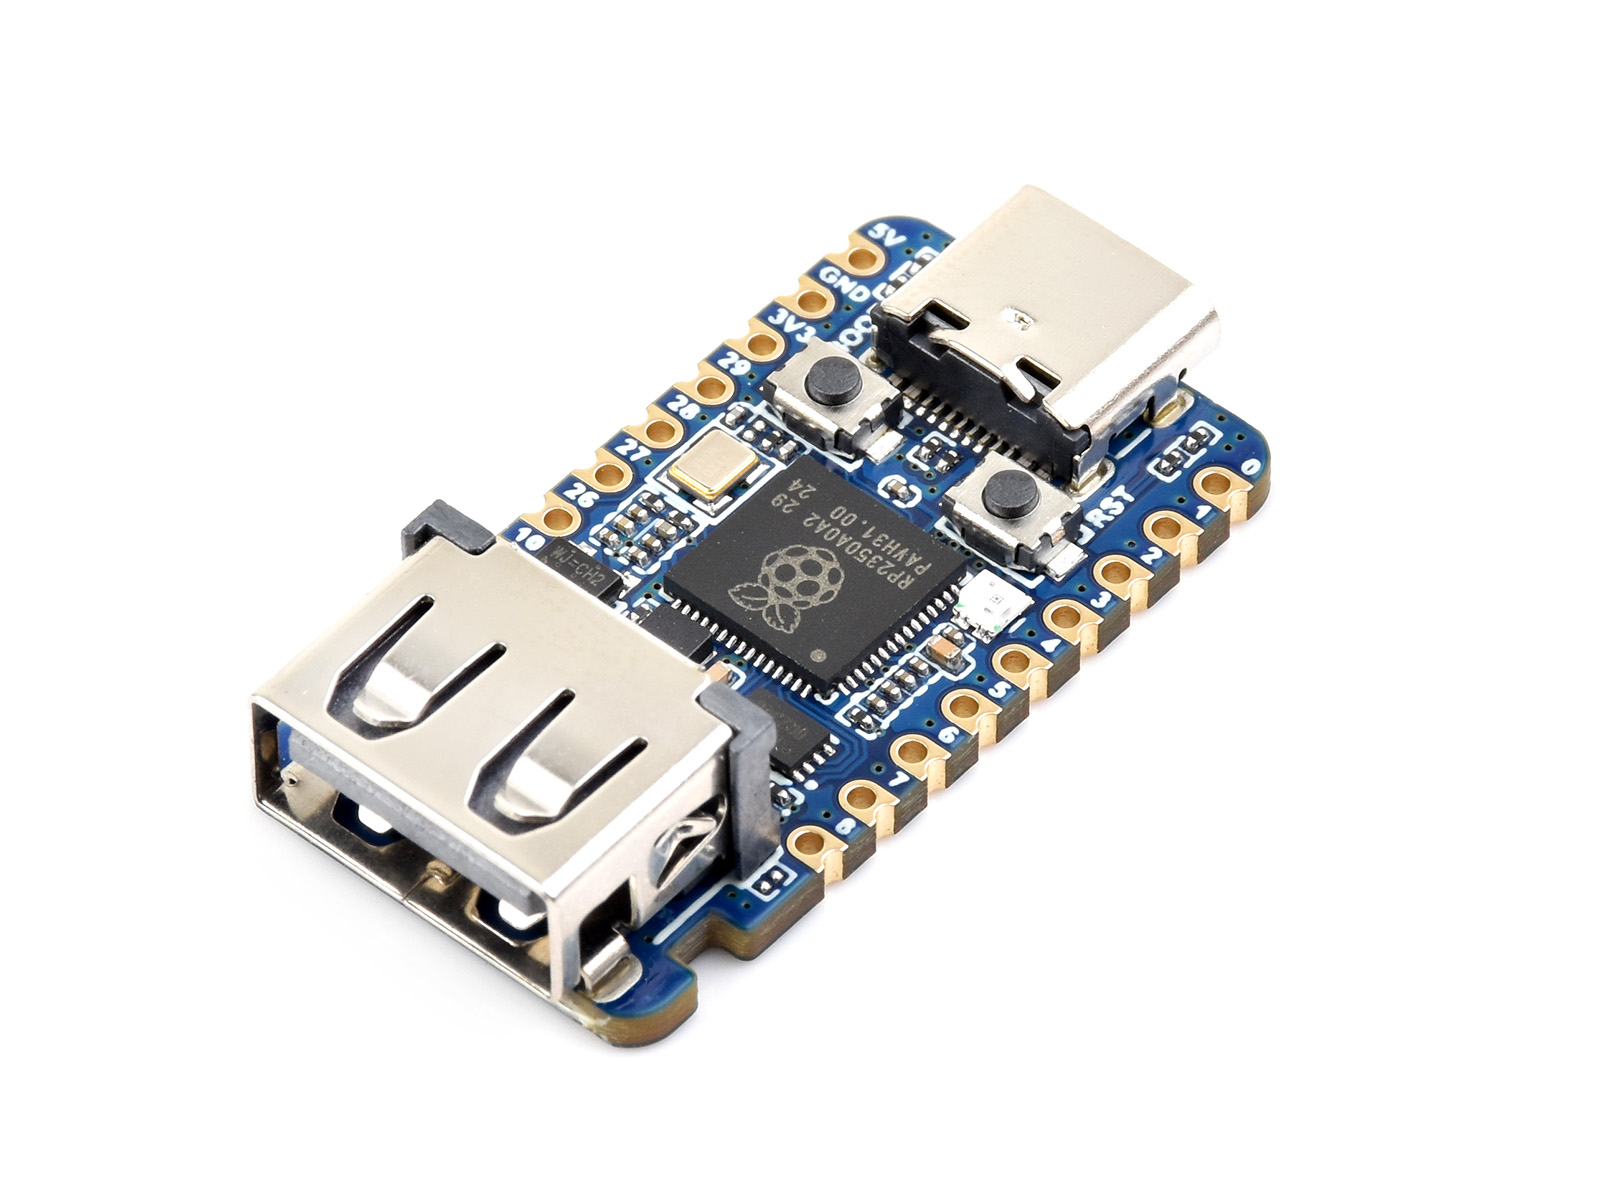
Waveshare RP2350 USB‑A board
Raspberry Pi Pico 2
If the Waveshare USB‑A board is unavailable, Raspberry Pi Pico 2 is an excellent alternative.
To use Pico 2 you will need either:
- A manually wired Lightning cable
- or
- A USB‑C breakout board

Raspberry Pi Pico 2 RP2350 alternative board
2. Firmware
Download the firmware package from:
https://mega.nz/folder/mRUzDCxK#n9Gq-Jfgvqp7tERKmXeiMQ
- Each supported board requires its own firmware.
- Always flash the firmware that matches your board model.
Supported firmware includes:
- Waveshare RP2350 USB‑A
- Waveshare RP2350 Zero
- Pimoroni Tiny2350
- Raspberry Pi Pico 2
⚠️ Flashing the wrong firmware may prevent the board from working correctly.
3. Flashing the Firmware (.UF2)
The flashing procedure is identical for all RP2350 boards.
💡 Firmware installation is a one-time process. Once flashed, the board can be reused indefinitely without reflashing, unless you choose to update to a newer firmware version.
- Step 1: Disconnect the RP2350 board from your computer.
- Step 2: Press and hold the
BOOT(BOOTSEL) button. - Step 3: While holding the BOOT button, connect the board to your computer.
- Step 4: Release the BOOT button. A removable USB drive will appear. Typical drive names include
RPI-RP2orRP2350. - Step 5: Drag and drop the correct
.UF2firmware file onto the drive.
Example filenames:usbliter8.waveshare_rp2350_usb_a.uf2usbliter8.waveshare_rp2350_zero.uf2usbliter8.pimoroni_tiny2350.uf2usbliter8.pico2.uf2
- Step 6: Wait 2–5 seconds. The board will automatically reboot. Firmware installation is now complete.
4. Hardware Connection
Option A — Waveshare RP2350 USB‑A
This is the easiest installation method.
Computer → RP2350 USB‑A → Lightning Cable → iPhone (DFU Mode)
- No cable modification is required.
- No soldering is required.
Option B — Raspberry Pi Pico 2 with cut Lightning cable
For Pico 2, solder four USB lines. USB cable wire colors can vary, so do not trust color only. Confirm each wire with a multimeter or a known cable pinout before soldering.
| Pico 2 Pin | USB Signal |
|---|---|
VBUS |
USB 5V |
GND |
Ground |
GP12 |
D+ |
GP13 |
D− |
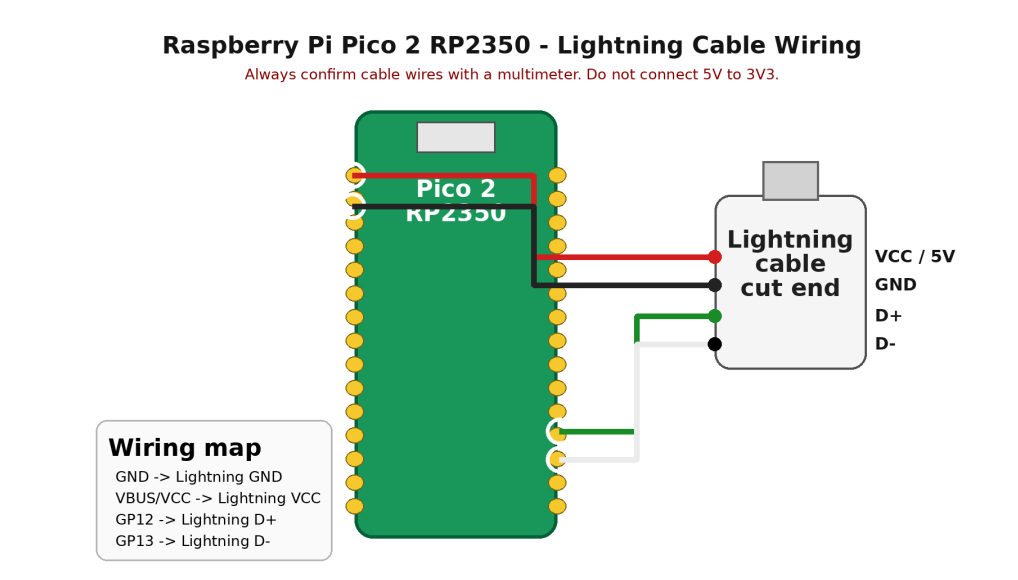
Diagram: Pico 2 RP2350 wiring for a cut Lightning cable
USB Data Cables – Before connecting your device, verify:
- D+ and D− are not swapped.
- There is no short circuit between VBUS and GND.
5. Using USBLITER8
For the highest success rate, follow this sequence:
- Connect the iPhone to your computer.
- Put the device into DFU Mode.
- Power on the RP2350 board.
- Wait until the status LED becomes orange.
- Connect the iPhone to the RP2350 board.
- The LED will blink blue – the exploit is running.
- When the LED returns to green, the process has completed successfully.
6. LED Status
| LED Status | Description |
|---|---|
| Orange | Board is ready or the operation |
| Green | USBLITER8 has completed successfully |
| Red | Exploit failed, reconnect Board and try again |
7. Troubleshooting
If the board does not work as expected:
- Verify that the correct firmware is installed.
- Check your USB cable.
- Confirm the device is in DFU Mode.
- Inspect all wiring connections.
- Ensure D+ and D− are not reversed.
- Make sure there is no short between VBUS and GND.
- Reflash the firmware if necessary.
Posted with the help of Techno Fayez


%20APK%20Full%20for%20Android.png)


